Ikat is a resist dyeing and weaving technique. While this textile craft is known as bandha kala or ‘tie art’ in Odisha, it is popularly known as ikat. The term ‘ikat’ is derived from the Indonesian language, and the craft is also widely practised in Indonesia, Japan, Central Asia, and also in Africa and Latin America. This essay explains the complicated Sambalpuri ikat weaving process with information culled from interviews and field observations with Surendra Meher, a national award-winning master weaver based in the Bargarh district in Odisha, the main production centre for Sambalpuri textiles. While ikat designs look fairly simple, the weaving procedure is, in fact, extremely complex, labour-intensive and time-consuming, involving almost all members of a weaver’s family. This long process (which can take between three days to three months depending on the design) can be broadly divided into four stages. Each stage has different artisan(s) working who specialising in a specific skill—designer, tier, dyer and weaver. Apart from four main stages there are other peripheral preparatory tasks performed by the women and children of the weaver family. This essay lays out these different stages in detail for a closer understanding of this craft.
1. Designer
The designer needs to first conceive of an attractive pattern for the fabric. In this his/her choice is limited to specific traditional motifs used in the Sambalpuri style—flowers, animals, birds, leaves and creepers are the most conventional images. These designs also need to be suited for reproduction in the ikat method. The traditional motifs originated in the past out of two main contexts. Earlier these textiles were mainly offered to the local gods, or ishtadevata, to seek blessings for professional prosperity and, therefore, included primarily floral and temple ritual-oriented patterns. The Dusphuliya design seen in saree borders, for instance, represents the 10 avatars of the supreme god, i.e. Vishnu. The fish and tortoise motifs, believed to be the first avatars before the God incarnated into human forms, according to Hindu mythology, is also recurrently used in the designs. Other auspicious omens such as the conch shell (sankha), holy seed (rudraksh), etc., are used to generate positive energy for the wearer. It is said that from this religious origin, later on the Sambalpuri textile moved to more secular practices of making sarees for everyday wear. However, while in these the iconographic configuration changed to various animal motifs comparing nature to feminine beauty—such as the fish’s round eyes, the lion’s small waist, the deer’s agility and the elephant’s graceful walk—even so a larger philosophical and religious basis informed the designs to bestow sanctity and prominence to the woman’s role in family and society. Until this day, the Sambalpuri textile art remains distinct and prized for its traditional moorings and newer contemporary designs are also strictly adapted to adhere to this larger history and rationale of the art.
The designer’s role is the most creative one in the production process as he/she needs to create a pattern out of limited motifs and yet juxtapose these using different colour combinations in imaginative and unique ways each time for a new saree. The designer, firstly, makes a drawing on paper and prepares three sets of patterns for the saree—for the border running on the two ends of the saree body, for the two and half hands long anchal and for the twelve hands long saree body. Usually the three patterns have to be very distinct from each other to create a striking effect. The width of the borders can vary from three inches to six inches depending on the design.
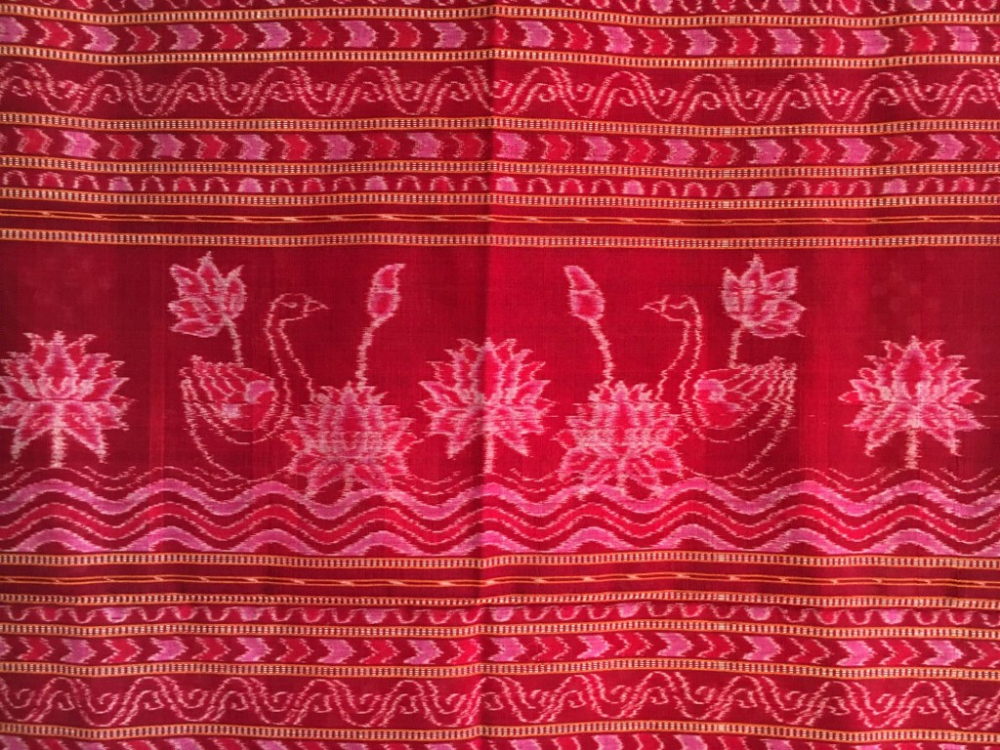
Figure 1. Traditional swan and duck motif. This is one of the traditional motifs used in Sambalpuri sarees, comparing feminine beauty and cadence to the movement of a swan or duck
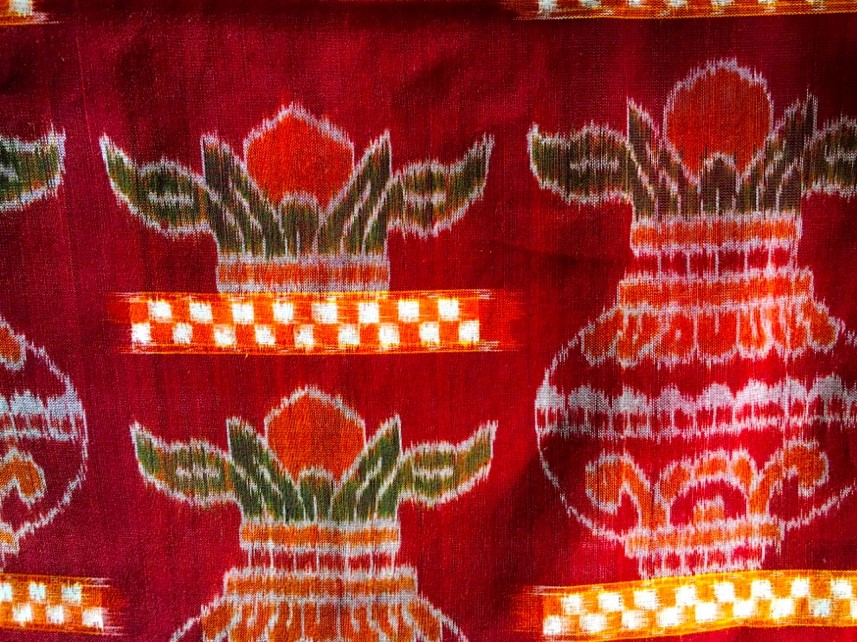
Figure 2. The kalasa depicts the ‘elixir’ pitcher used in temples with the coconut on top and mango leaves on the sides
2. Tier
The second stage is the most difficult and crucial stage to execute. The tier has the onus of calculating with utmost precision the placing of the knots according to the design’s blueprint and upon his skill depends the final clarity of the pattern. The tier first marks the placement of knots on the threads with a scale before making the bonds. The tier also has the responsibility of choosing the thread best suited for the design which can be a tricky task. Threads range from fine to coarse or thick variety and the design’s success depends on the choice of thread used. The finest in single thread are numbered as follows—100s, 80s, 60s, 40s, 32s, 24s, 20s, 18s, 17s. The other is the mercerized thread (twisted thread made with two strands) which is more commonly used since it is stronger and easier to weave. From finest to coarser the mercerized thread is numbered as follows—2/120s, 2/100s, 2/80s, 2/60s, 2/40s.
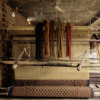
Before the tying is performed the cotton yarn is first prepared for this step with a set of complex procedures. The cloth is first divided into the warp (vertical yarn, locally called tani) and weft (horizontal yarn, or buna). These yarns are then placed against a wooden frame locally termed phani (Figure 3). The process of preparing vertical yarn from raw unrefined hank is called ‘warping’. The hank yarn is first transferred to a traditional winding device and then wound around the warping frame according to the length of the warp. Usually the width of the saree is 48 inches and bedcovers range from 48 to 54, 60, 72 and 90 inches width. The frame is always made two inches more in width than the product since during weaving the cloth’s width shortens by two inches. The frame is prepared according to the thickness of the thread—coarser thread requiring a broader frame. Two threads passing through each eye of the reed is called kari; 60 threads or karis make a punja or a cluster. According to the thread’s thickness and the width of the phani, the clusters can also be adjusted—lessened or increased. For a saree, first the 2/100s mercerized yarn is sized and bunched into the warp. For a 48 inches width saree, a frame of 50 inches is created. For 2/120s thread warp, ordinarily 36 karis are taken. And, for the entire width of the wooden frame, 30 clusters of karis are used. Similarly, for 2/100s no. thread, 28 clusters and for 2/80s no. thread, 23 clusters can be used. The coarser the thread, the smaller the number of clusters made, so that during the dye process colour can seep in properly into the clusters.
For the weft or buna also a similar process is carried out although the weft’s density in clusters is mostly kept slightly thicker than the warp, because during weaving the weft thread gathers closer together than the warp. While 2/120 no. thread per inch needs 40 karis, 2/100 no. thread per inch needs 36 karis and 2/80 no. thread needs 32 karis. Therefore, when transferring a design from the drawing to the bandha or the threads, one has to be very careful about the kind of thread selected and its density during weaving. For an intricately designed saree, ordinarily 2/120 no. thread is used, which during weaving translates to about 40 karis per inch. Keeping this calculation in mind, the drawn design is then proportionately multiplied in inches and transferred to the threads.
Before the yarn is put to the frame, different handmade equipments (uphunna, asari, katoro, jantura, purra, etc.) are used to size the threads. Based on the width of the cloth (saree, bedsheet etc.) and after the thread selection is made, with help of komoancha or a comb, the threads are counted and clustered. This is usually done by the women in the household. Once all this is completed, the male head member and the main weaver fits the yarn onto the frame and with the help of a scale and knife calculates and marks precise measurements to tie knots on the threads. Usually white threads are used to make knots, after which, according to the design, one by one the colours are applied in layers through dyeing (Figure 4). Several layers of tying and colouring is carried out to get the particular shades and patterns in the design. Once all the layers are formed, the final knots are opened and the yarn is prepared for weaving.
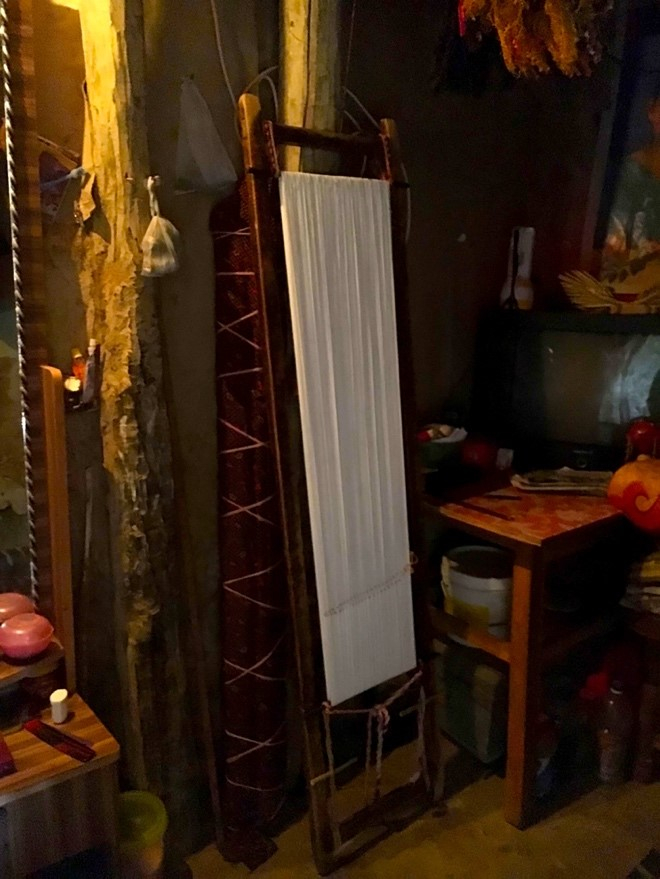
Figure 3. Wooden frame on which warp is wound uniformly before making clusters for the tying process

Figure 4. These short thin cotton threads are used to make the knots on the yarn according to design prior to the colouring process
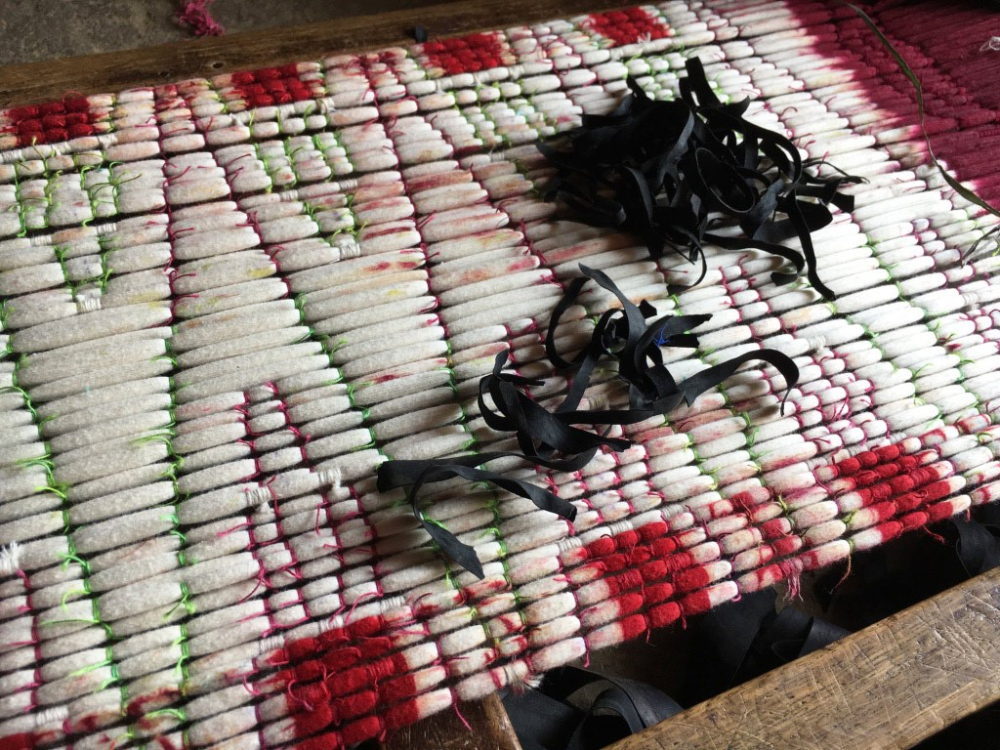
Figure 5. These short rubber bands cut out of old tyres are used during tying and colouring to cover the portions which are to be protected from dyeing
3. Colourist/Dyer
The third stage in the production is the process of colouring or dyeing. In olden times, natural colours were produced from various flowers, roots and barks of trees and plants and were therefore limited in range. Amongst these, yellow, red, maroon, black and white were more prevalent and categorised as traditional vegetable dyes. Yellow is derived from turmeric, maroon from aachi tree’s bark, and red from jhampada flower seeds. But in recent times new chemical colours are being used. The chemical colour’s resilience, durability and wide variety has led to its demand. There are two components required to make chemical colours—one, hydrosulphate and, two, caustic soda. These two are mixed with the colours to make them permanent. In this process various shades of green, blue, purple, yellow and pink can be prepared (figure 6). Other types of colours are produced with the chemical napthal, such as maroon, black, red and yellow.
The colouring process, although seemingly simpler, also requires skill and adequate knowledge. Otherwise, if not treated properly, there are high chances of the colours getting washed away and fading quickly. For different colours different procedures are followed with varying ranges of water temperature for dipping the threads and different proportions of other mixes such as chemicals and dyes. Each colour also has a light and deep shade and several aspects have to be carefully thought through, for instance, which color to apply over which according to their intensities. Yellow, pink and sky blue are considered to be the lighter colours and in these the mixes of hydrosulphate and caustic soda are relatively lesser. Navy blue, violet and green are the deeper colours and override other colours, therefore, hydrosulphate and caustic soda is added in greater measures for these to increase the temperature of water.
When making a colour using napthal chemical, a mixture of napthal and caustic soda is added to boiling water, and the yarn is dipped in this liquid and then dried. Again the colours are added to cold water and the dried yarn is dipped once more in the cold water. The fabrics prepared in this process tend to run water for a few days, but after subsequent washes the hues start to look even more bright.
Before dying, the loose threads are first soaked in hot water for two hours with soda and prematex and then dried. In a half-dried state, the threads are dipped again in hot water. Due to this procedure, when the threads are finally dyed, colours are absorbed easily and evenly. After all the colours have been properly applied, the final knots are opened for the concluding stage—weaving.
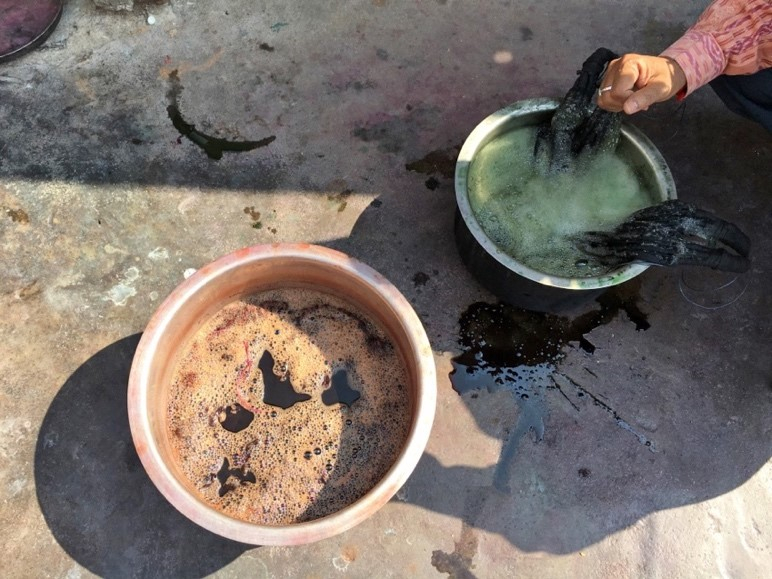
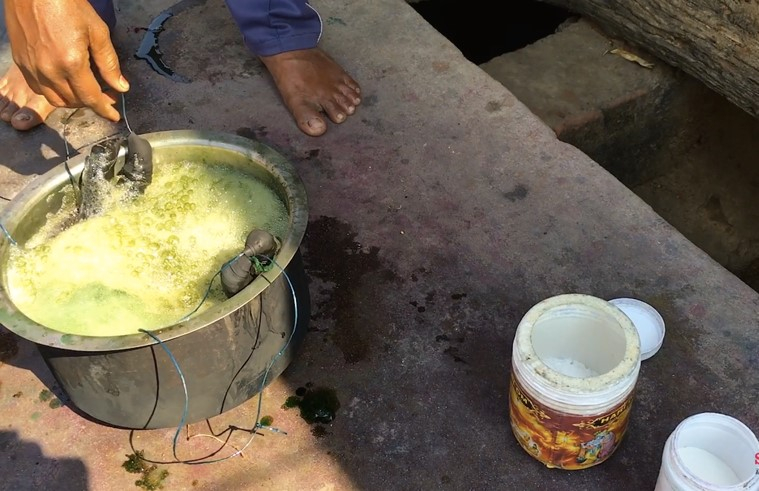
Figure 6. Hydrosulphate and caustic soda are two chemicals largely used along with natural dyes to make the threads absorb the colours faster and uniformly and prevent easy fading and running of colours.
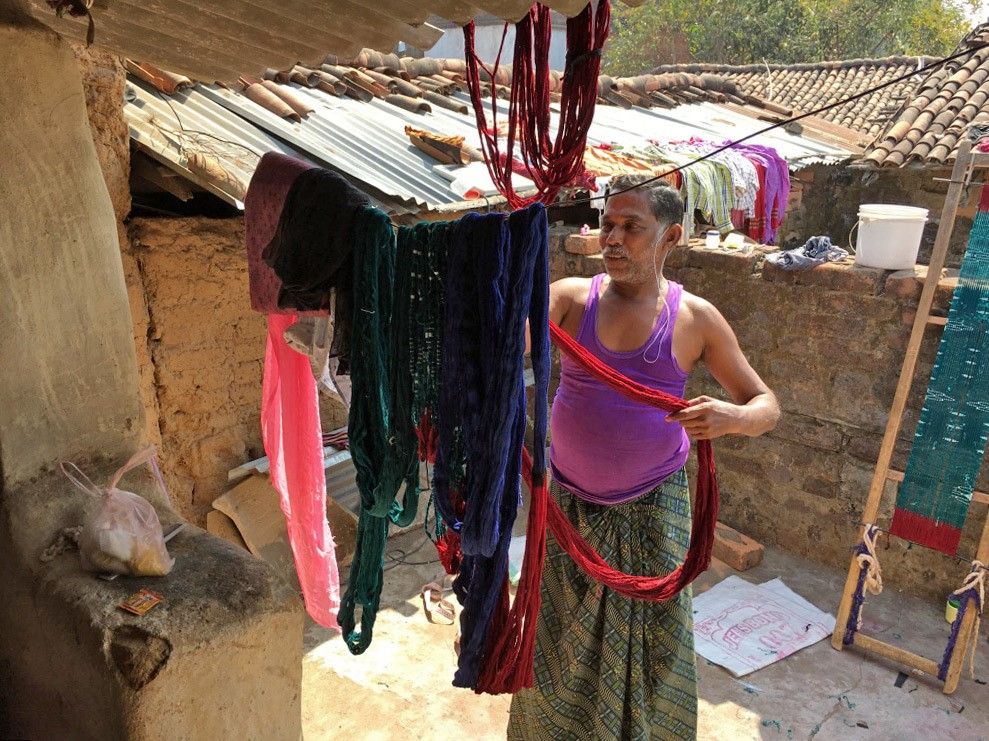
Figure 7. Warp yarns dried after two stages of dyeing.
4. Weaver
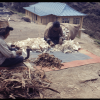
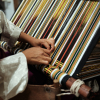
To weave the cloth, a monga or handmade loom is required. In that different types of equipments are installed—hatha, thooker, nori or dongi, nali, thooker patta, kami, phoola, dobi, phoola kaniya, chupi jhara, thoon (balloon), muyer, badi, etc. Before the warp is put into loom, the women put the thread into the jontoor (instrument used to make the warp). The men take the final warp kept in an open space, size it properly and apply gum, made of rice, on it. This process is locally called pajini. After that the previously prepared wooden frame is brought and the warp yarn is carefully tied to it. Once all the threads are joined, again in an open area, it is spread and sized. This process is called judsar or joining. Every weaver’s house, therefore, has an open area designated for this, where the joining and gumming work can be performed. This open space also substitutes for other social gatherings and feasts, such as a wedding. For the gumming and joining process, the equipment needed are: kunchi, charisaro, muendbari, boyla, and ropes. During this process a lot of threads tend to tear. Therefore, a sophisticated technique is used to join broken threads such that weaving can be performed smoothly. After the pajini and judsar processes (gumming and joining the threads), the warp is taken to the loom yard for weaving. The sized threads are wound into a small wooden instrument, noli or shuttle, which moves back and forth on the loom, to weave the threads densely (figure 10). And every time the shuttle is moved, the weaver places his hand underneath the thread and with his fingers carefully mounts the design for greater clarity.
The ikat weaving procedure can further be performed in three different ways which produce varying results in the final product:
1. Warp Ikat: This is the relatively simple method in which the warp yarn (or the vertically aligned yarn) is resist dyed and fixed to the loom. The weft yarn then retains the solid colour, often white, which creates a soft look in the pattern.
2. Weft Ikat: Weft yarn or the woof yarn is the horizontally woven thread in the fabric. For this method, the warp yarn is in solid colours while the weft yarn is resist dyed. Achieving a desired pattern in the weft yarn is more challenging. Once the thread completes one loop, it is adjusted manually to align the pattern in place before the next loop is woven.
3. Double Ikat: This is the most expensive and the most beautiful ikat type, while also the most labour-intensive. In this both warp and weft yarns are resist-dyed repeatedly. Then when they are woven in place, the final pattern slowly forms. A neat double ikat fabric can be woven only by the exceptionally skilled weavers.
None of these techniques of weaving are formally taught but weavers believe that the skill is in their blood and is naturally learnt from observation and involvement starting at a young age. From a very tender age, members of the family tend to show a deep inclination for this art alongside education. It takes approximately four to eight days to make a single saree according to this process, with the help of the entire household. As a result, the lifestyle of a weaver becomes intimately linked to the very practice of weaving. The craft has, therefore, become a way of life for the weaver community.
Although known as ‘Sambalpuri’, the main production centers from this craft are not located in Sambalpur but the adjoining villages in the Bargarh district. The weavers involved in this profession are the Meher community which are further divided into three sects—Bhuliya, Kusta and Kuli. The Kuli community produces the more ordinary kinds of weaves, the plainer designs. Kusta community is extremely skilled in making silk and matha (tussar or raw silk) sarees. Their main work is to extract the tussar from the kosa or silk worm cocoon. The sarees made in silk tend to have a plain body, since silk allows limited option for resist dye, and are traditionally called ‘kumbha sarees’ or Phera design sarees because of the typical temple motif borders. But the Kustas are limited in their knowledge of the more sophisticated techniques of tie and dye art, which is the forte of the Bhuliya community. This community primarily works with cotton, and to a lesser degree with silk yarns. According to the specific design iconography, traditionally these sarees used to have different names—Naliniprabha, Kalingasundari, Indumati, Bhanumati, Kalingaratna, Malinitoya, etc. Apart from sarees, more recently, bedcovers, handkerchiefs, wall hangings, shirts, scarves, etc., are also made, which have become more popular in international communities.
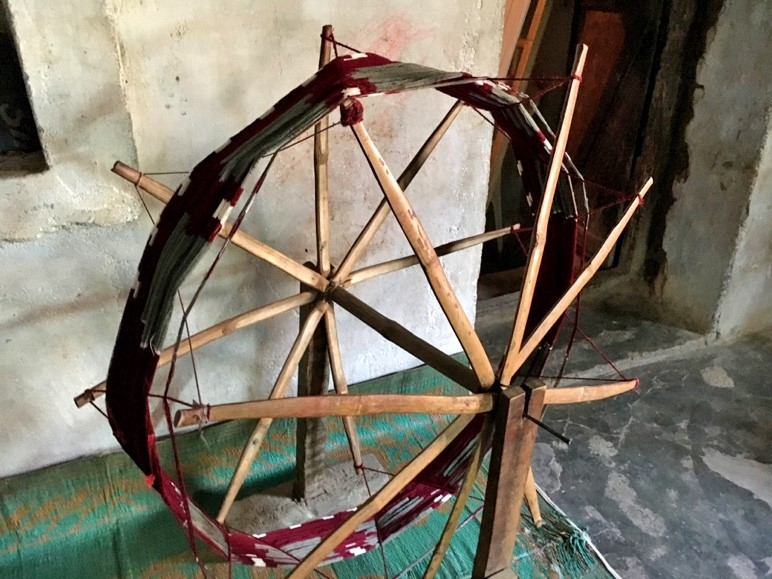
Figure 8. Boyla, an instrument used to wind threads for straightening and sizing
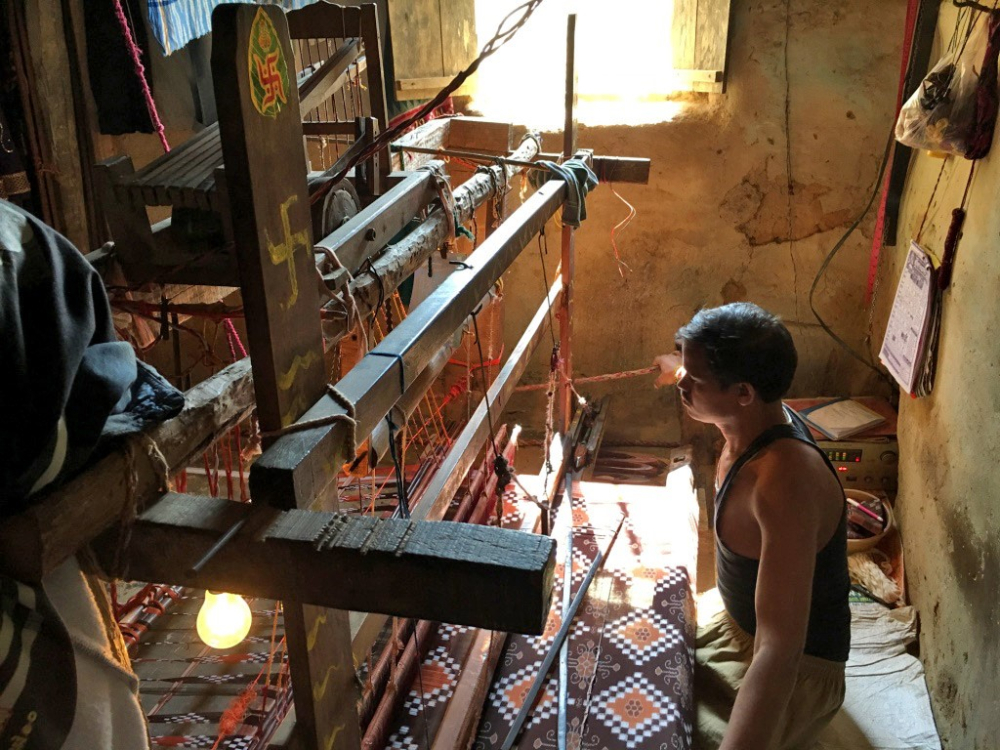
Figure 9. Single ikat loom
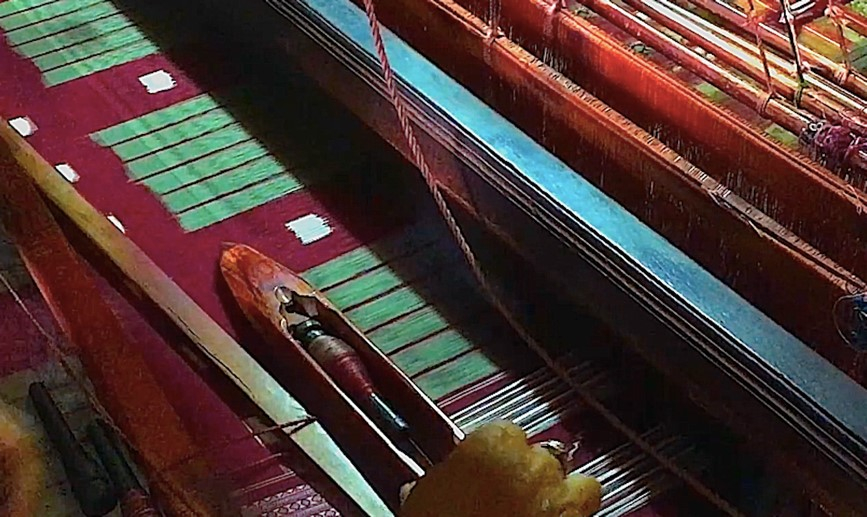
Figure 10. The dongi or wooden shuttle with which the thread wound inside it. The shuttle moves back and forth during weaving, carrying the thread across the width of the loom.
Approximate production cycle timeline (For 2 pieces of saree measuring 11 meters)
|
|
Total Process |
Weaving of fine cotton variety |
Weaving of coarse cotton variety |
|
i) |
Warping (generally performed by women) |
1 day (8–10 hrs) for 2 pieces, i.e. 11 metres |
1 day (8–10 hrs) for 2 pieces, i.e. 11 metres |
|
ii) |
Preparation of Tie an Dye (2 persons) |
4 days |
2 days |
|
iii) |
Winding of coloured threads (by women and children) |
1 day (casually done by women and children) |
1 day (casually done by women and children) |
|
iv) |
Sizing (by 2 male persons) (Street sizing method) |
4–5 hrs |
4–5 hrs |
|
v) |
Preparation of looms |
3–4 hrs |
2–3 hrs |
|
vi) |
Weaving |
7 days |
3 days |
Sources
Interview conducted with Surender Meher on 28th February, 2017.
Field observation and visits to loom yards and weavers’ houses in Barpali village conducted on 27th February, 2017.